How to Perform an Ad-Hoc Screen
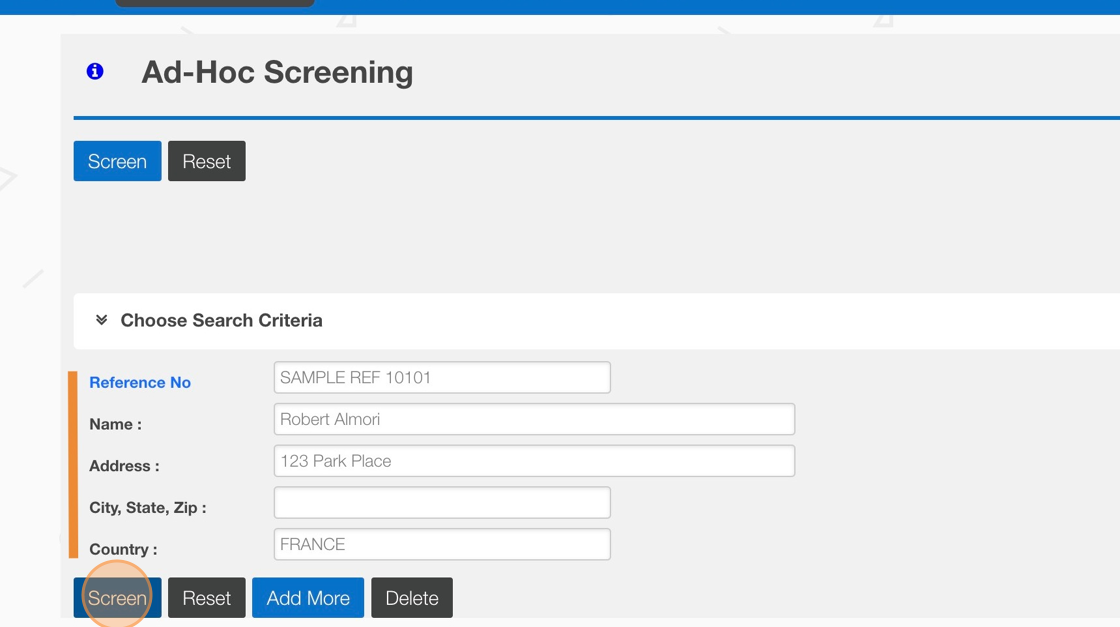
1. Log into OCR EASE Platform and set your Active module to "Watch List Screening"
2. Complete the input fields to define the entity's screening profile (Name, address, country, etc.)

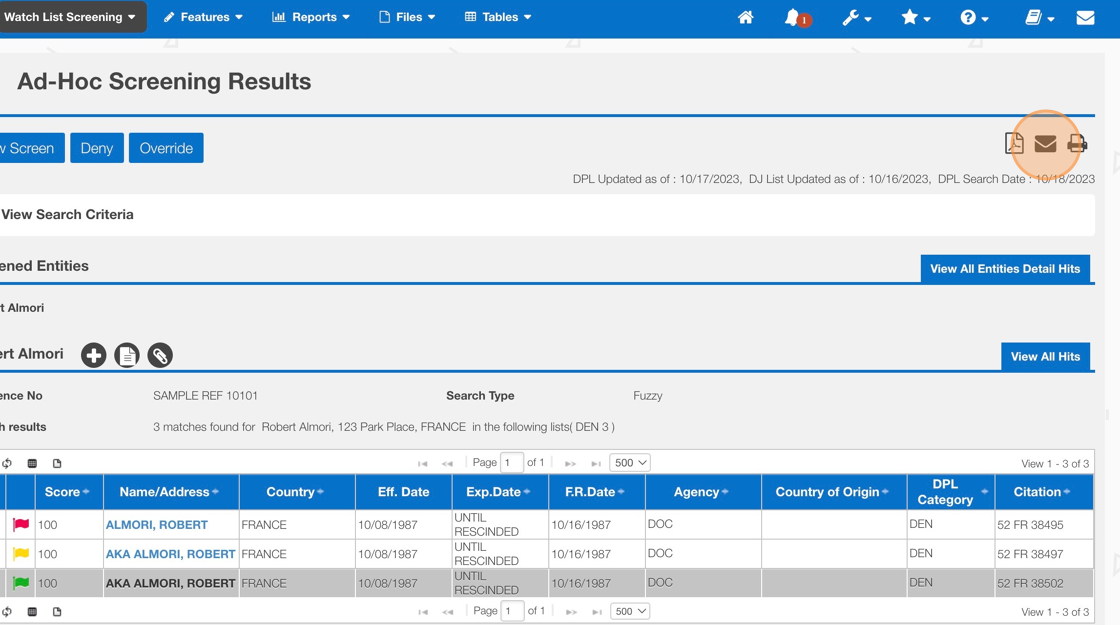
Understanding & Viewing Hit Details
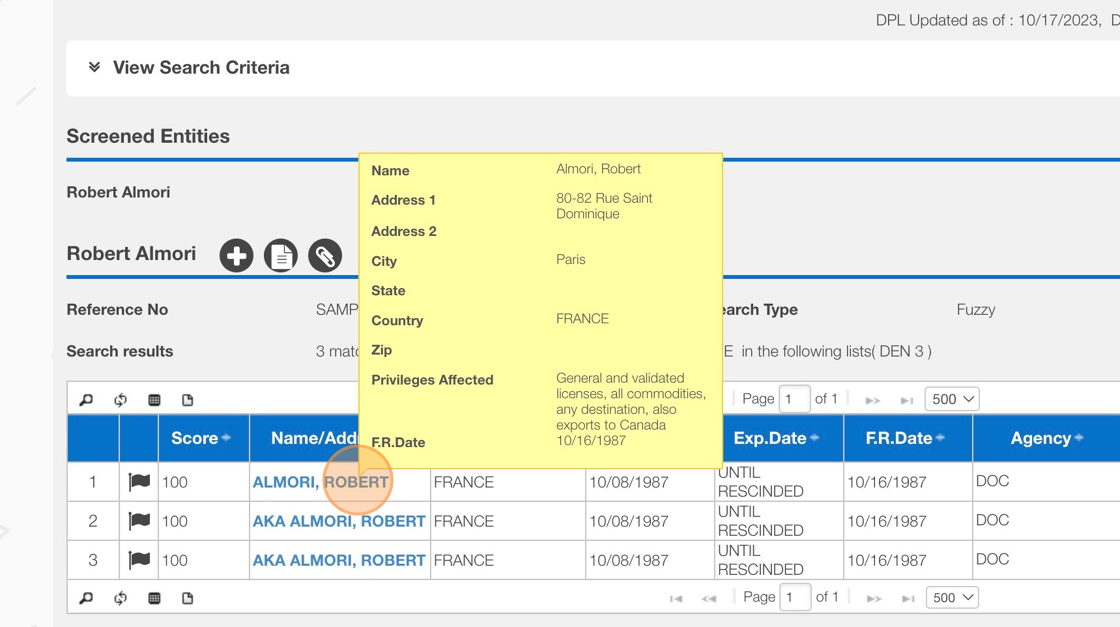
3. Placing your cursor over the Name/Address links will show a snapshot summary.
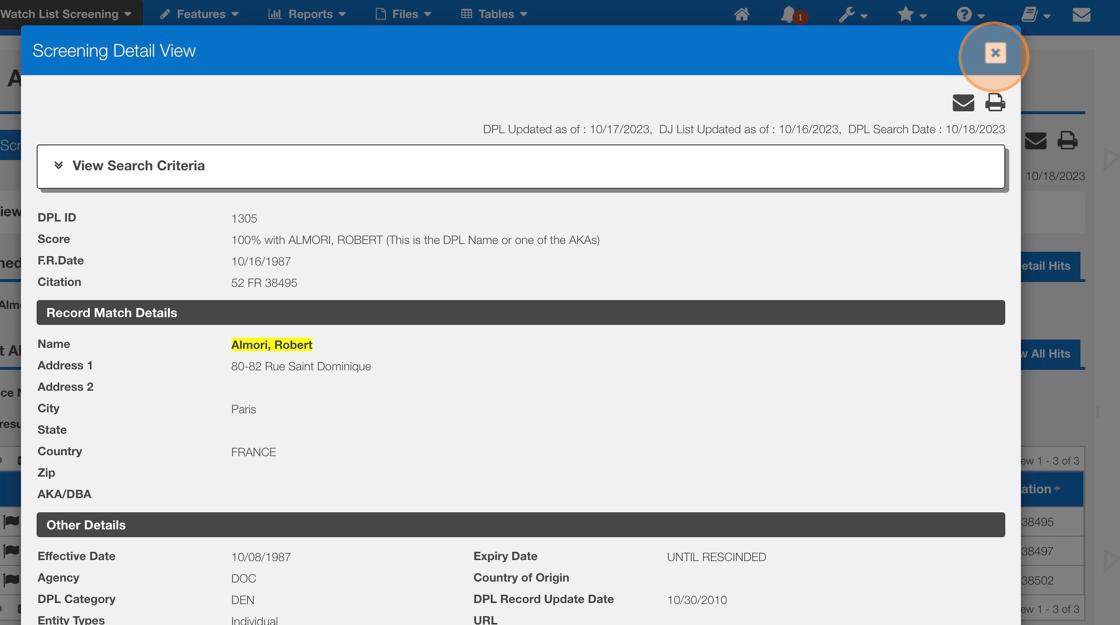
4. Click on the Entity Name to view the Screening Detail View. The screening detail view has a highlight feature to assist with syntax matches. Additionally, the sections "Record Match Details" and "Privileges Effected" assist with making the deny/override business decision.
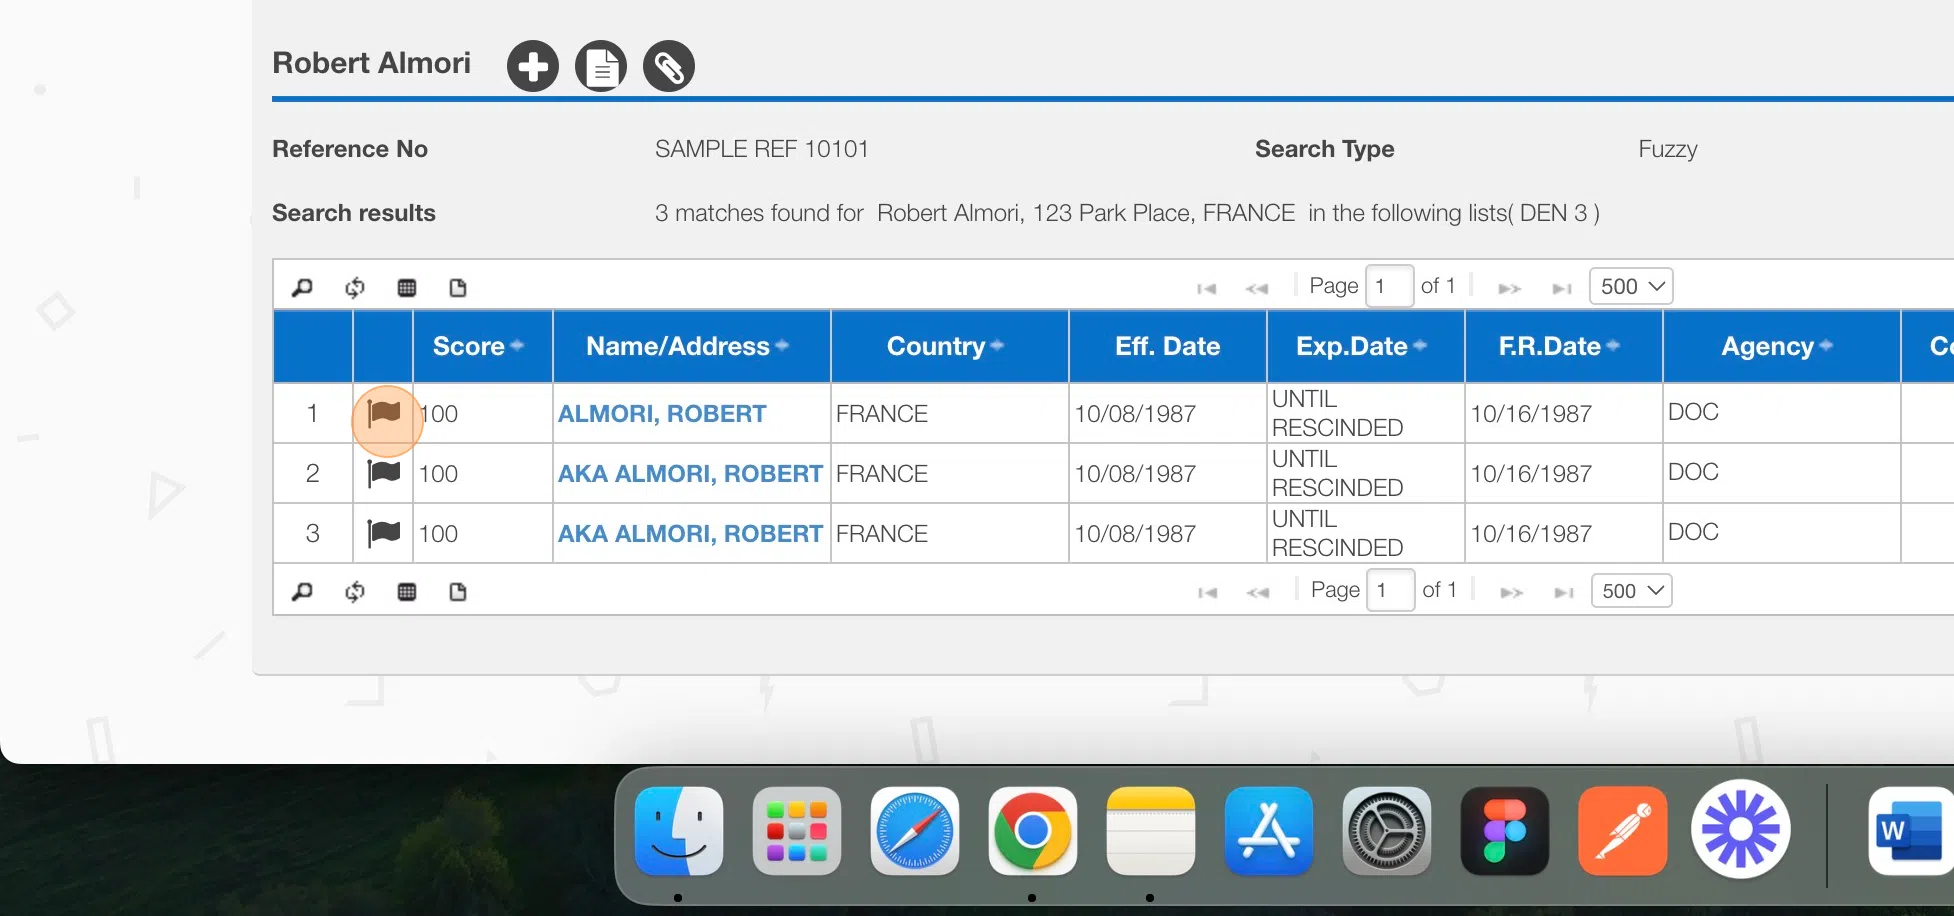
Using the Flagging Fetaure

5. Click the Flag icon to set the color coordinated to risk or comfort level.
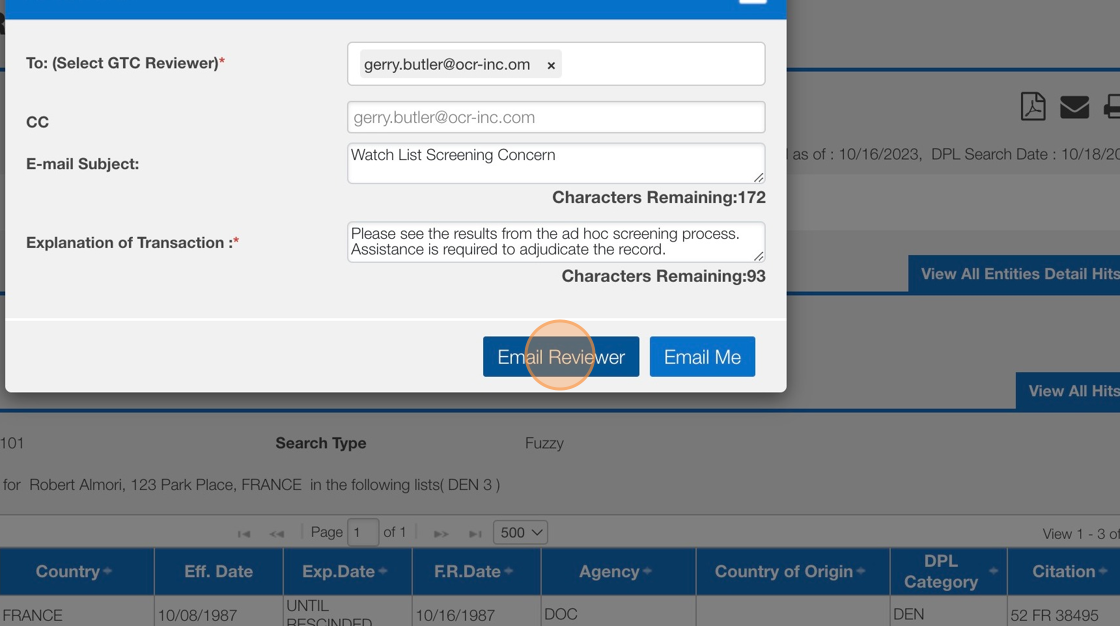
Escalating to a WLS Reviewer
6. Click the "Email" icon.
7. After defining or confirm the email attribute, Click "Email Reviewer"
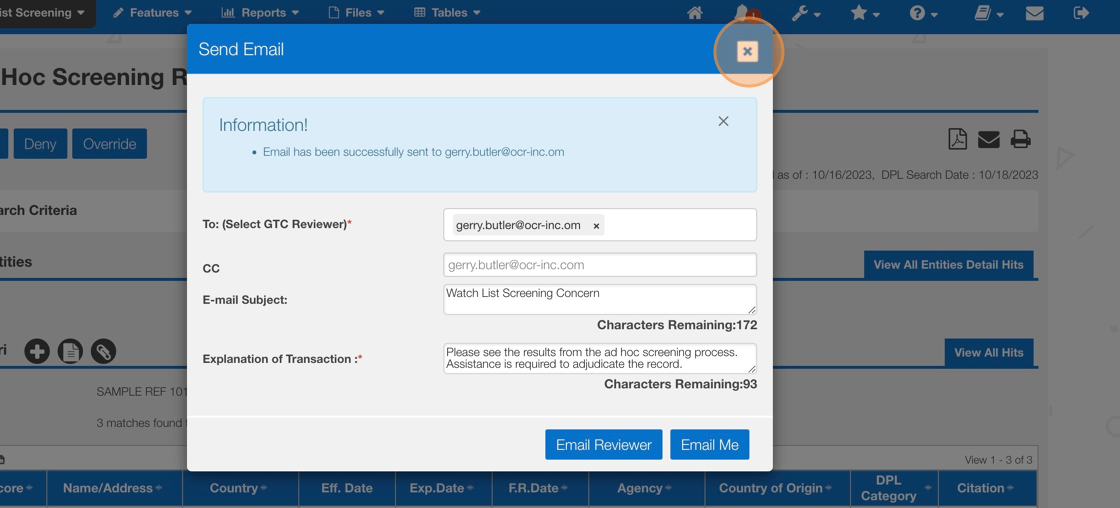
8. Click "X" to close out the email alert to the review.
Downloading a Hard Copy of the Screening Results
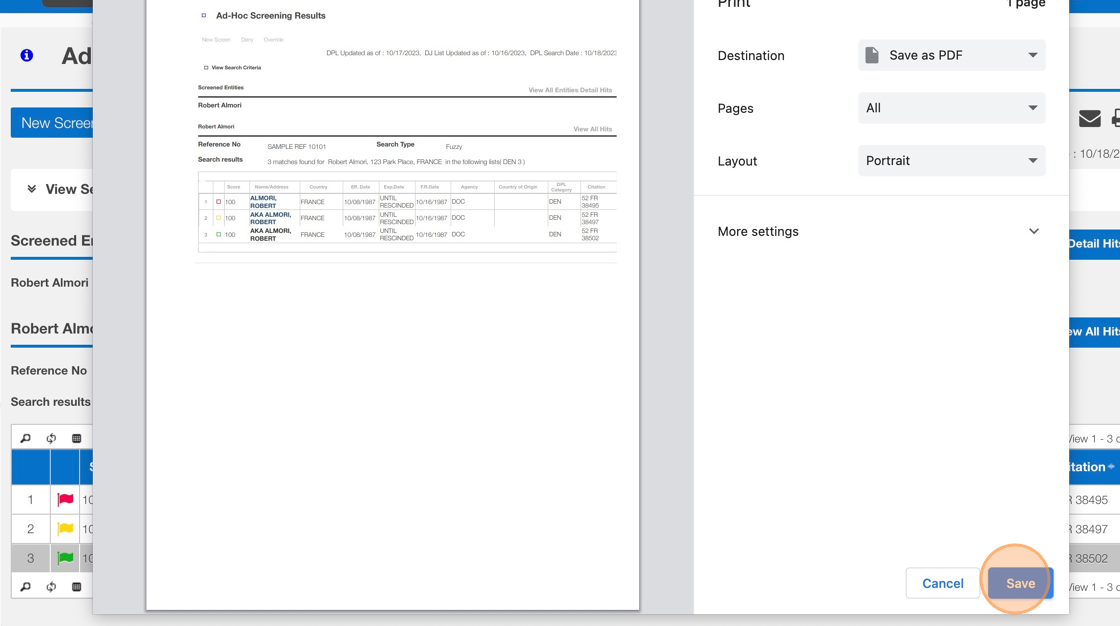
9. Click "Print" Icon
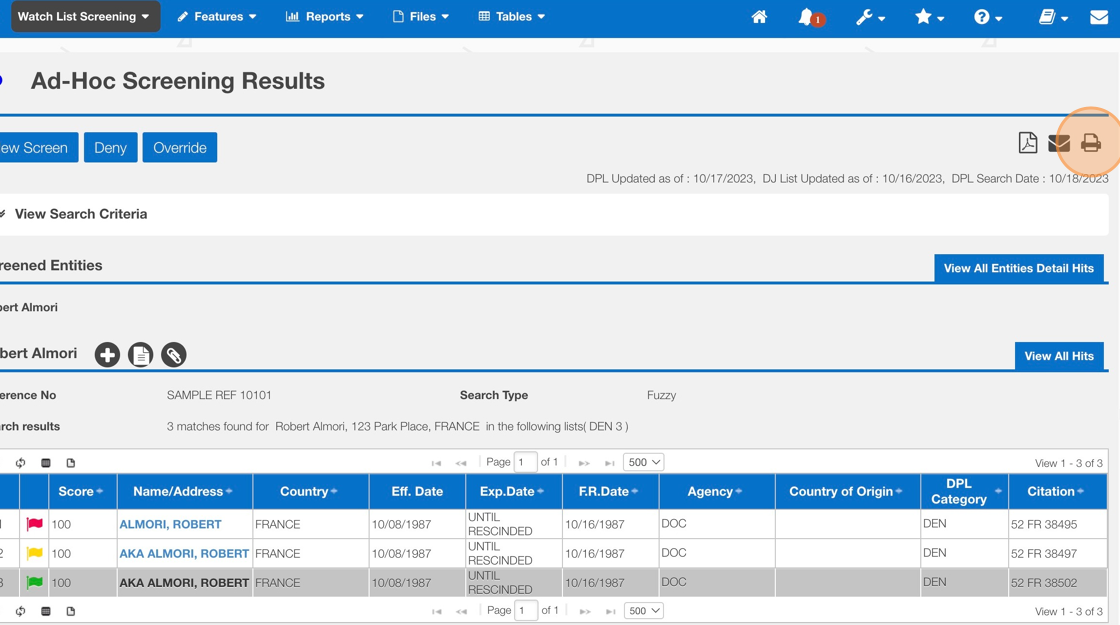
10. Click "Save" to download a local copy.
Related Articles
How to Screen Multiple Entities Simultaneously via Ad Hoc Screening
This guide provides a step-by-step process for screening multiple entities simultaneously using ad hoc screening. It offers a clear and concise set of instructions, making it easy for users to follow along and efficiently screen multiple entities. By ...How to Configure a Default Ad-hoc screening reference number
This guide provides step-by-step instructions on how to configure a default ad-hoc screening reference number. By following these steps, users can easily set up a system-generated number template for ad-hoc screenings, ensuring consistency and ...How to Notify or Escalate to a Screening Reviewer - Ad Hoc Screening
This guide provides step-by-step instructions on how to notify or escalate to a screening reviewer using an ad hoc screening process. It is a useful resource for individuals who need to efficiently escalate screening tasks and ensure they are ...How to Deny/Override - AdHoc Screening Result Screen
This guide provides step-by-step instructions on how to deny or override an AdHoc Screening Result Screen. By following these steps, users will be able to navigate through the necessary clicks and checkboxes to successfully override the screening ...How to perform a product lookup (via Portal)
This guide provides step-by-step instructions on how to perform a product lookup via a portal. By following these steps, users can easily find specific products by entering relevant information such as SKU number or part number. This guide is useful ...