How To Generate an API Key for Google Translate
How to Create a New Account in Google Cloud Console

1. Access the Google Cloud Console and log in or, if you do not have an account yet, sign up.
2. Open the left side menu of the console and select Billing.
3. Click on the button New billing account. Keep in mind that if this is not your first billing account, you must first open the list of billing accounts. To do this, click on the name of your existing billing account near the top of the page and then click on Manage billing accounts.
4. Enter the name of the billing account and your billing information. The options you’ll see depend on the country of your billing address.
5. Click Submit and enable billing.
How to Create a New Project in Google Cloud
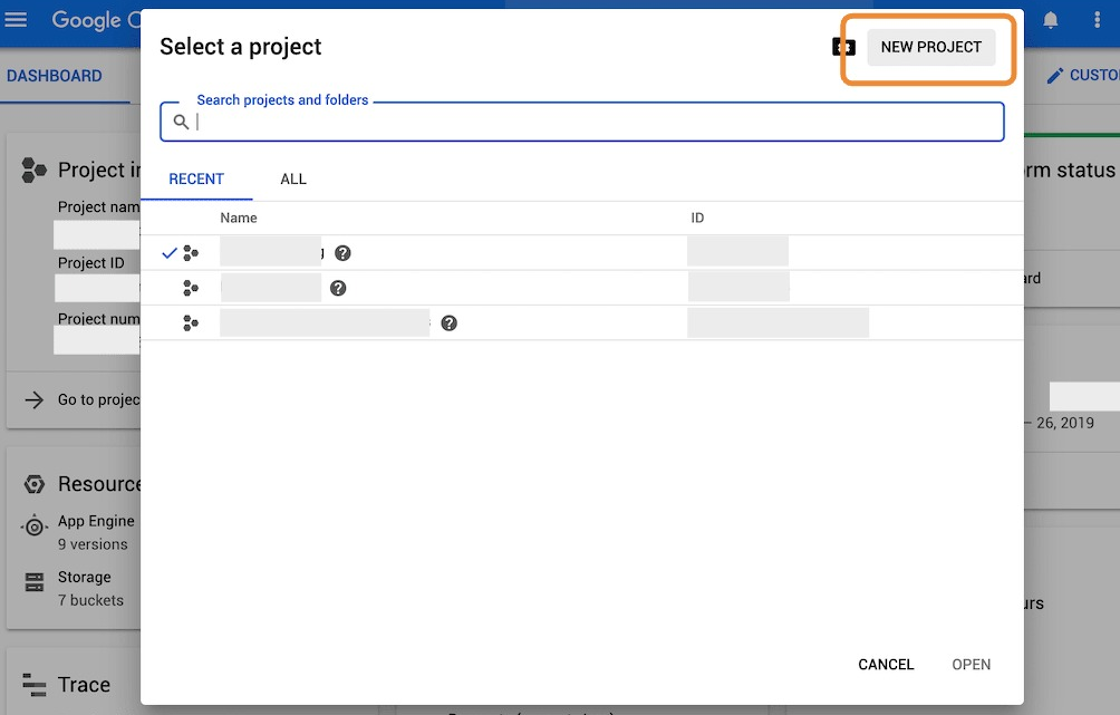
6. Go to the bar in the top of the window and in the drop-down you can see your created projects as well as the option to create a new one by clicking on the New Project button:
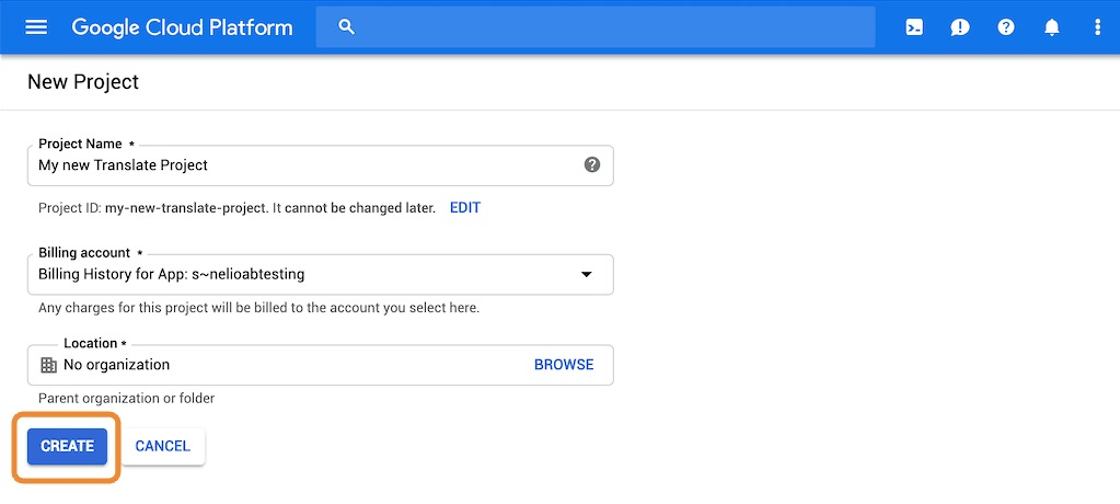
7. Now give the new project a name and create it by clicking on the corresponding button, as you can see in the following screenshot:
Activate the Google Translate API
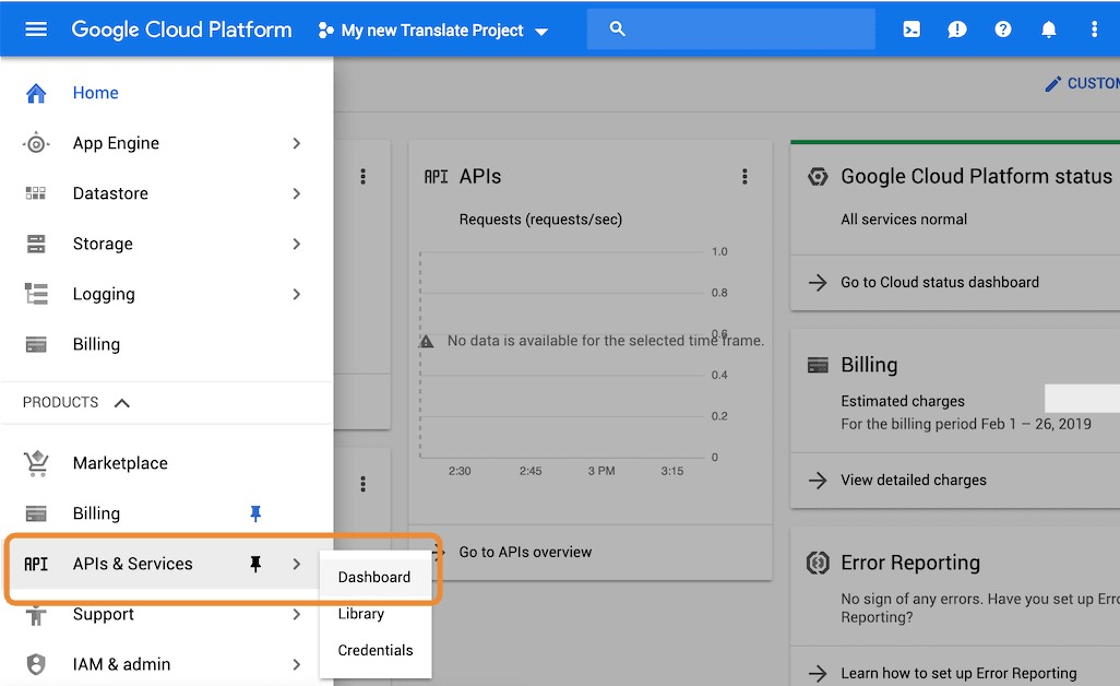
8. Go to the side menu and select the APIs & Services option. Click Dashboard:
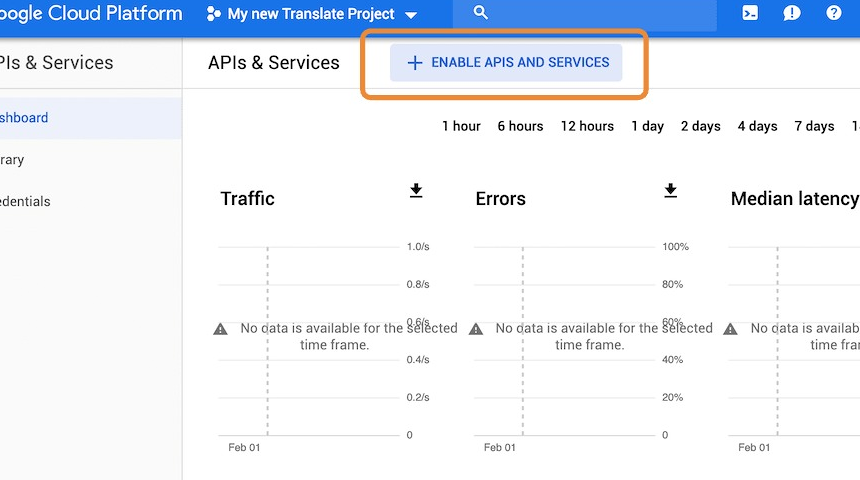
9. Click on the upper button Enable APIs and services to continue.
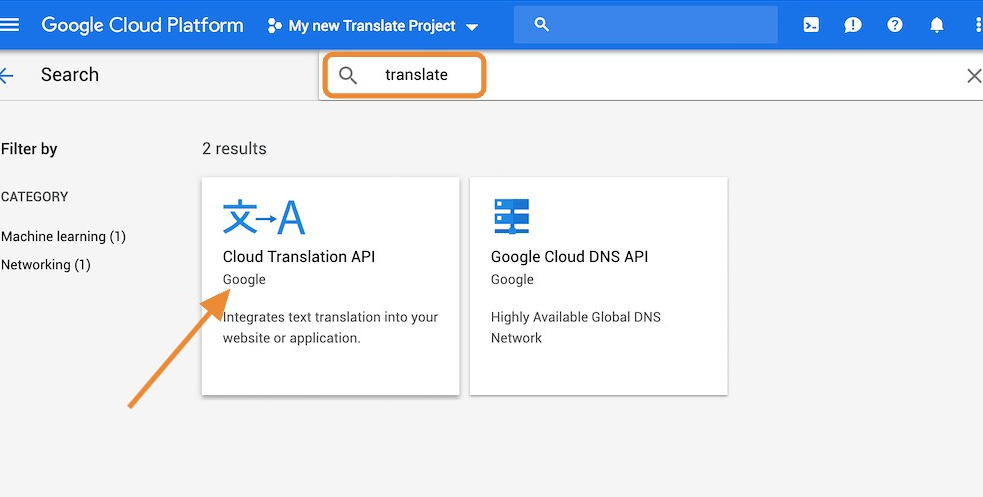
10. In the Search bar, type "Translate". Click "Cloud Translation API"
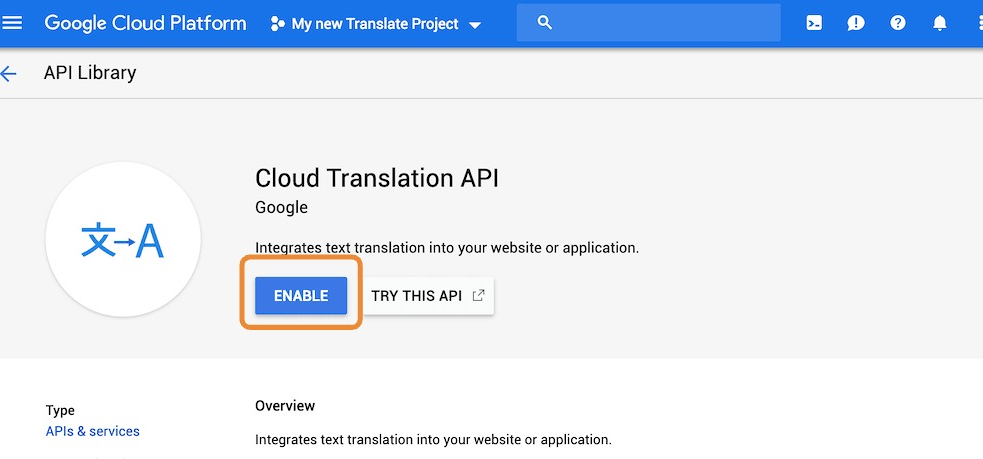
11. Click the "Enable" button.
Create a new API Key for Google Translate
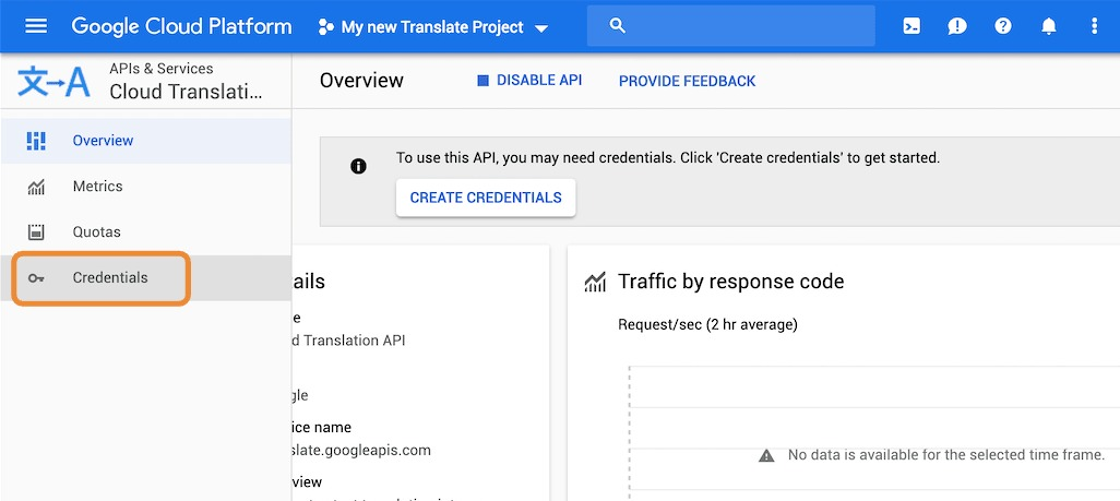
12. Using the side menu bar within the Project, Click "Credentials"

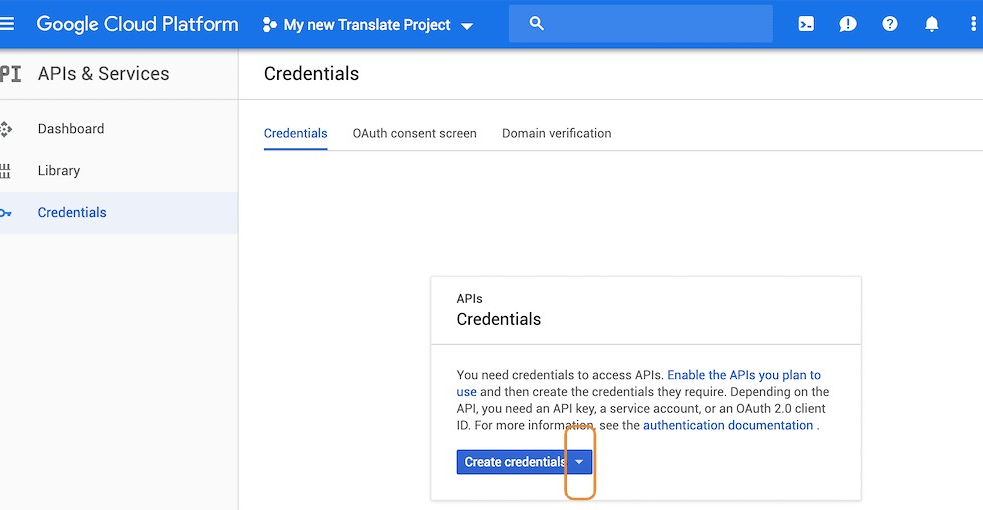
13. On the Credential Screen, use the DROP-DOWN arrow to the right of "Create credentials." Select API KEY option.
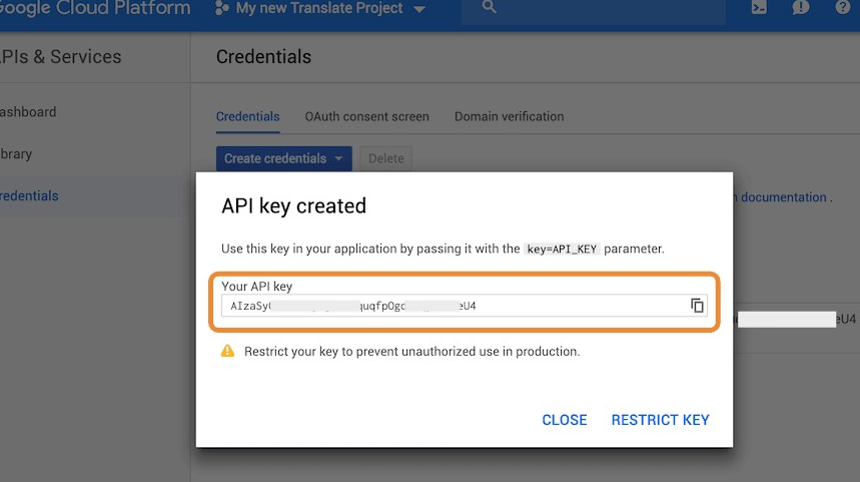
14. A new Key API is created. Copy the key and provide it your OCR representative.
Related Articles
Exporting Digital Certificate - DECCS
Steps: 1. Open Microsoft Edge, Internet Explorer, or Google Chrome. "Click" the ellipse icon to open the browser settings option. 2. Scroll down to click "Settings" 3. Using the Search function, type "Certificates" 4. Click "Manage certificates" 5. ...How to Generate a report for Future / Past Visitors
This article covers the steps required to filter visitors based on a date range. This article is helpful when trying to locate single-day visitors or multi-day visitors and the related report output. Steps: 1. Click the "Dashboard" icon 2. Click the ...How to Deny/Override - AdHoc Screening Result Screen
This guide provides step-by-step instructions on how to deny or override an AdHoc Screening Result Screen. By following these steps, users will be able to navigate through the necessary clicks and checkboxes to successfully override the screening ...How To Access the Knowledge Base
This guide provides step-by-step instructions on how to access the knowledge base, making it easier for users to find the information they need. By following these simple steps, users can quickly navigate through the different categories and find ...Configure number format template in EASE
This guide provides step-by-step instructions on accessing and managing commodity classifications and certificates of origin. It explains how to navigate to the relevant platform, search for existing templates, view and configure templates, and find ...